- Customers
- Customer View
- Subscriptions
- Invoices
- Payments
- Manual Payments
- Live Payments
- Payment Methods
- Customer Contacts
- Customer Notes
- Batches
- Early Admin
- Early Invoice
- Early Batches
- Adjustments
- eMandate
Documentation
Getting Started
Manage
Branding
Bill Again allows you to reflect your company’s image and brand to your Customers through the customisation of items sent and seen by Customers from your Bill Again account. These items include invoices, statements, reports and emails sent to Customers as well as your Customer Contact log in portal.
The Branding page can be reached by selecting the Branding option from the left hand main menu. The Branding page is split in to two sections, one dealing with report branding and the other deals with Portal setup. From the report branding page you are enabled to customise your account’s:
- Logo
- Customer Reports
Logo
The logo specified here will be at the header of all your reports, invoices, Emails and in your Bill Again Customer Site header. To upload a Logo, select the upload logo button at the top, right of the page and select it from your device’s storage. Once selected and uploaded the logo will be displayed at the top of all documents and emails sent to Customers as well as by displayed on top of their log-in portal for your Bill Again Account.
Please note that logos to be uploaded needs to be smaller than 400 by 400 pixels and in either a .jpeg, .jpg, .png or .bmp format otherwise the system will not accept it. If at any time you should wish to remove this logo or upload a new one, you can do so by selecting the Clear Logo or Upload Logo button at the top. The changes you make to your logo will reflect on future invoices and reports sent as well as you Customer Portal automatically.
Report customisation
Customisation specified in this section will be applied to all Invoices and emails sent to Customers. The Section also provides you with a preview of how your setting will look like to Customers receiving emails or viewing Invoices from you.
From this section you will be able to specify the following details:
- Report Colour One
- Report Colour Two
- Terms
- Notes

Branding Page
Invoices and Emails have to colour setting, titled One and Two. The first colour will be displayed to the top of an Invoice or email and the second one on the heading of tables containing the items being billed. The preview included with the section clearly illustrates where each colour will apply. To select or change these colours, simply select them from the “Report Colour 1” and “Report Colour 2” dropdowns at the top of the Reports Design section.
The Terms and Notes fields will determine the text to be displayed and each of these headings on the bottom of all invoices sent to Customers. To add or change these simply edit the text contained in the relevant box at the bottom of the Reports Design section. The changes you make here will automatically be applied to all future invoices sent to Customers.
Please note that it is required to click the Save button, either at the top or bottom, of the branding page in order to save and apply the changes you make on this page. Failing to click the Save button will result in your changes being lost and not implemented on the Customer Portal. Conversely, selecting the Cancel button on the bottom of the page will discard all the changes you made.
Billing Design
Customisation specified in this section will be applied to the Customer portal, or Site, from which Customer Contacts will be able to log in, view Invoices and make Payments. This portal will be discussed in detail within its own section on this guide entitled “Sites”. The Section also provides you with a preview of how your setting will look like to Customers logging in to the Customer Portal.
From this section you will be able to specify the following items for the Customer Portal:
- Billing header colour
- Company name display in header
- Company Details
- Contact Details
- Support Details
- Facebook and Twitter link
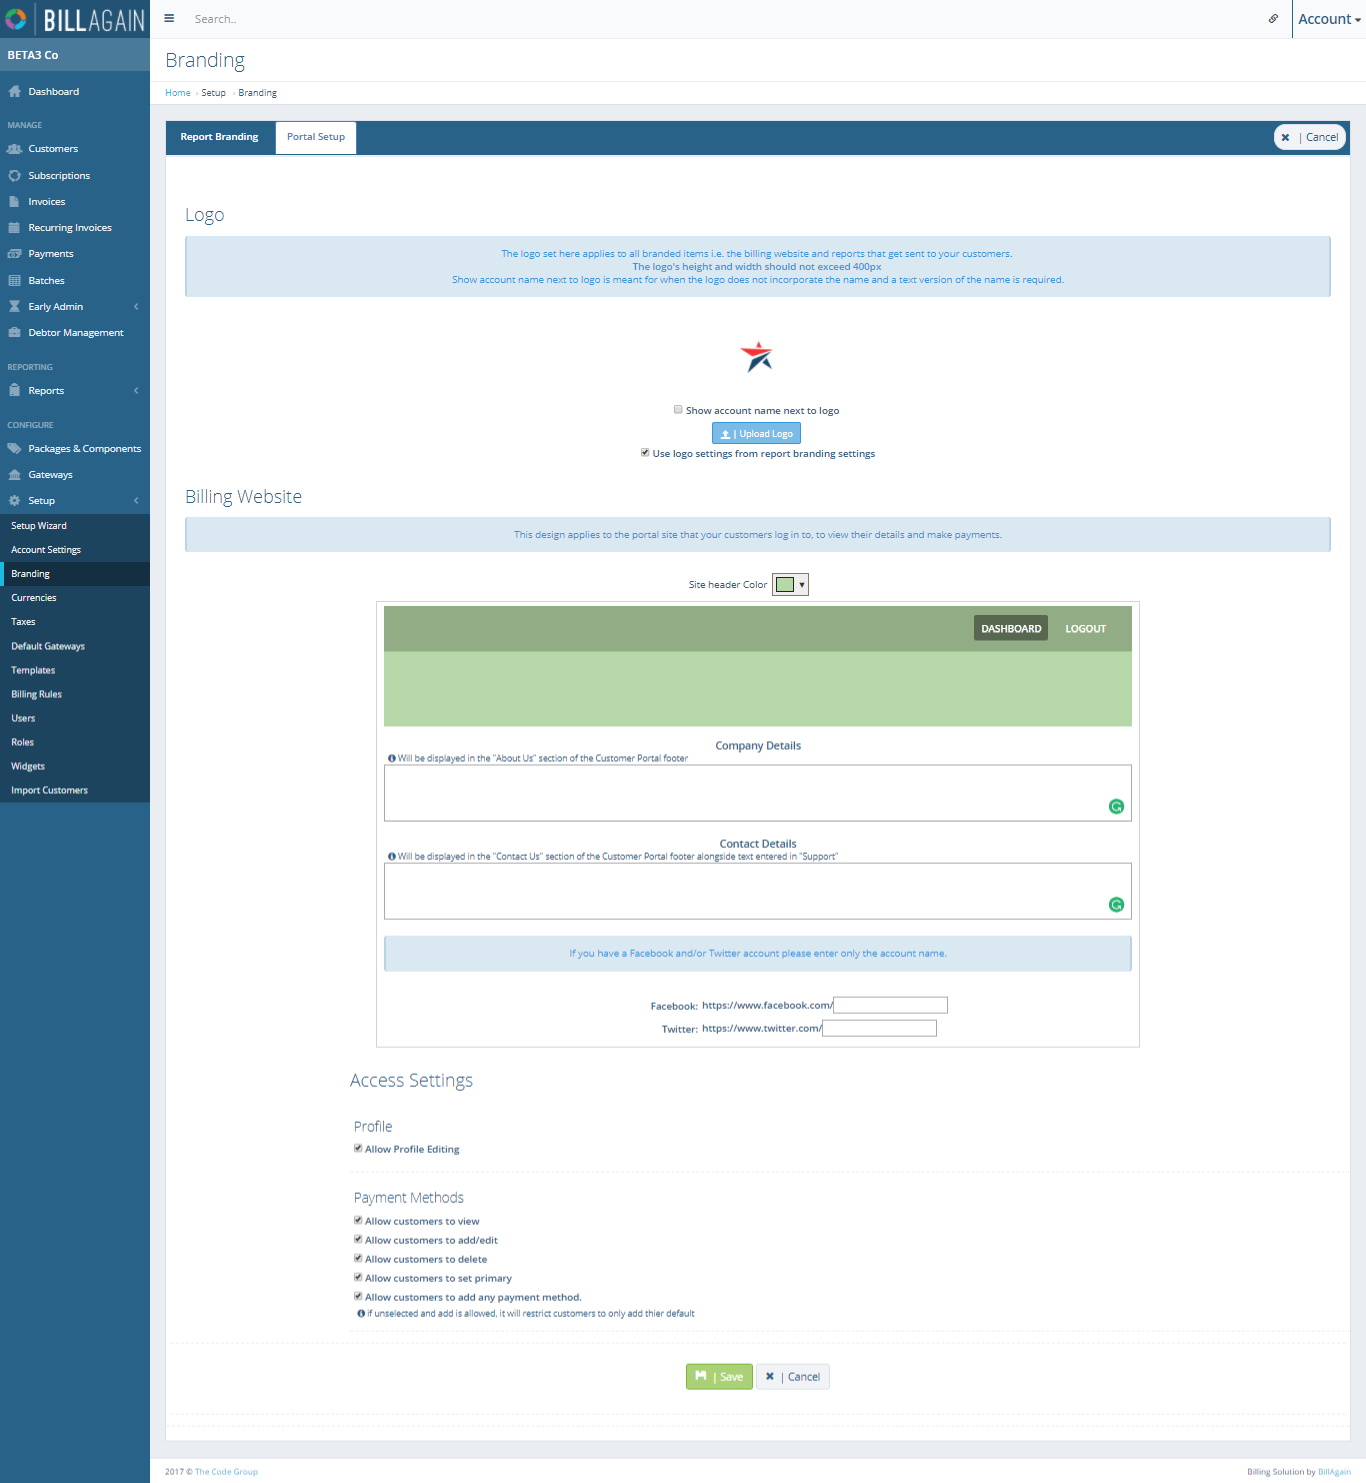
Billing Website Design
The website header colour will determine the colour of the bar at the top of the Customer log in Portal, while the show header text option will set whether the Customer Site will display your company name at the top or not. To change the header colour simply select a colour from the dropdown entitled “Site header colour” on the top of the Website Design section. To specify whether the company name is to be displayed at the top of the Site or not, select or unselect the “Show header text” option at the top of the Website Design section.
The Company Details, Contact Details and Support details fields will determine what is displayed on the Company, Contact and Support pages on the Customer log in portal. This means that whatever text you enter in these fields on the Branding page will be reflected on the Customer portal on their respective pages. To add or change the content of these items simply change the text contained within them as you would a normal text document.
The Facebook and Twitter fields at the bottom of the section is for adding your company’s Facebook address name and Twitter handler. These are not required in any way but can be added if your company are present on these networks. If entered, Customers using you Bill Again portal will be able to click the Twitter or Facebook icons at the bottom of the portal can be redirected to your company’s Twitter or Facebook pages. To add or edit these fields simply change their content as you would for a normal text document.
Depending on the preferences specified in the branding portal setup. A customer can action multiple changes to their billing preferences. These include view, edit or add bank account(emandate) or credit card details (will requires 3d secure if gateway requires it).
Please note that it is required to click the Save button, either at the top or bottom, of the branding page in order to save and apply the changes you make on this page. Failing to click the Save button will result in your changes being lost and not implemented on the Customer Portal. Conversely, selecting the Cancel button on the bottom of the page will discard all the changes you made.
Branding Overview
The Branding Page allows you to upload a company logo which will be displayed on your Customer login portal as well as reports and Invoices.
Portal Setup