- Customers
- Customer View
- Subscriptions
- Invoices
- Payments
- Manual Payments
- Live Payments
- Payment Methods
- Customer Contacts
- Customer Notes
- Batches
- Early Admin
- Early Invoice
- Early Batches
- Adjustments
- eMandate
Documentation
Getting Started
Manage
Users
You can invite staff members or anyone involved in managing your billing process to your Bill Again account to assist in managing your account. Inviting these Users will allow them to set up login details for your account which they can then use to log into the system. Inviting staff members works on the basis of registering them from this page, which will send them further instructions on how to set up their account.
All Users you invite will be limited in terms of what they can do in the system based on the Role you assign them. Roles specify permissions for specific functions within Bill Again, this will be explained in more detail late in this section as well as in its own section entitled “Roles”.
Users Overview
This area of Bill Again is accessed by way of the left-hand main menu, specifically by clicking on Users under the Setup option. This brings the user to a table formatted list of all the invoices currently logged in the system, as shown below:
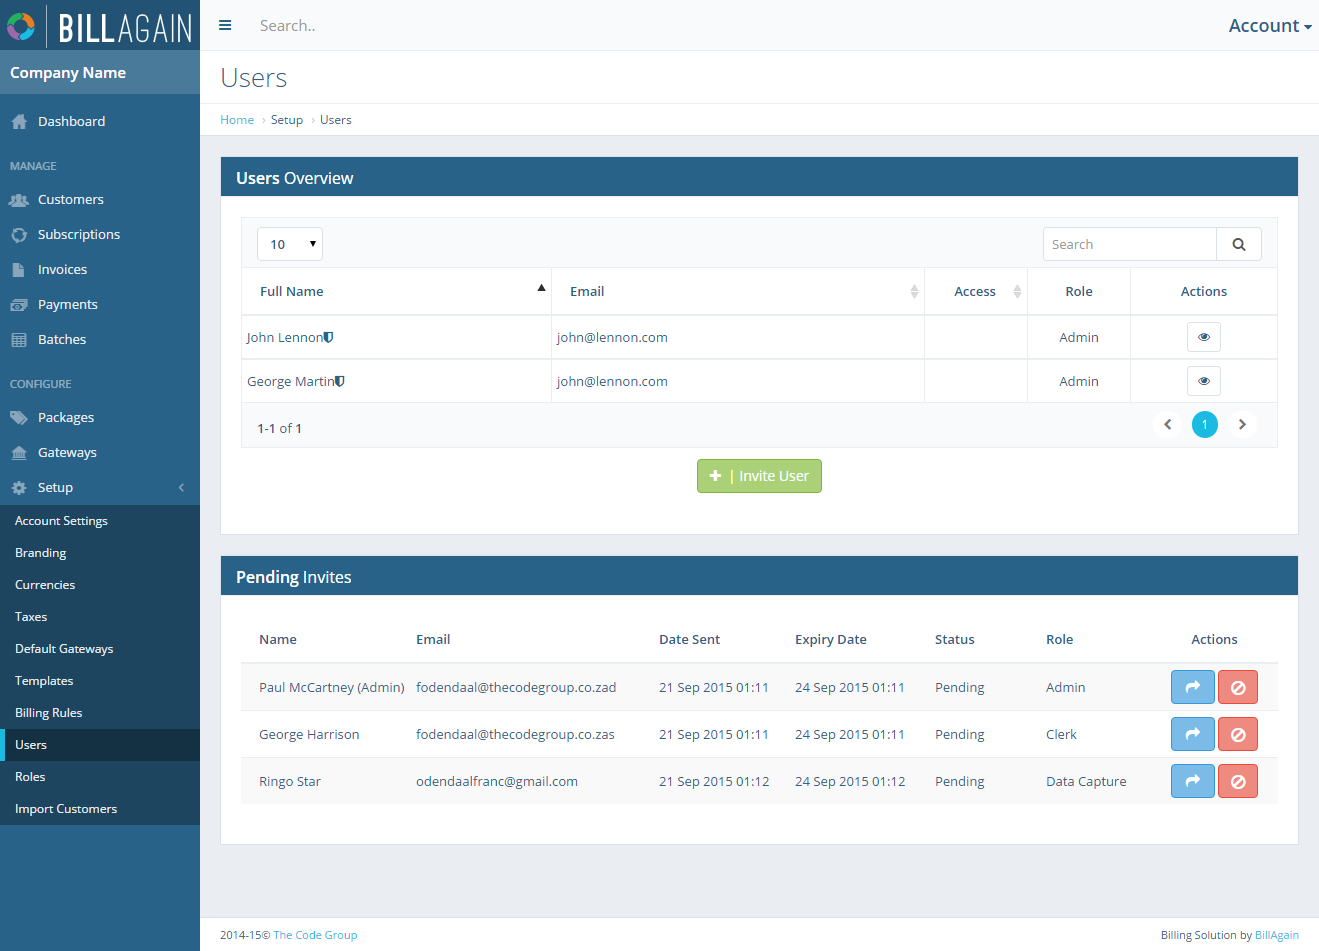
Users Overview
This screen provides immediate, summary-based information for Users as well as giving the user the following options for single, specific Users:
- Viewing a User
- Inviting a new User
- Editing an existing User
- Deleting a User
- Removing/Giving access to Users
- Resending an invitation
- Cancelling an ivitation
The fields on this screen include:
- Full Name
- Access
- Role
- Actions – (View, Edit, Delete)
Viewing a User
When the View button is clicked next to a corresponding User on the User Overview page, a detailed description of that User’s details is displayed. These details include:
- First Name
- Last Name
- Email Address
- Time Zone
- Title
- Role
The View page does not provide any functionality but only displays the currently saved details of the selected User. To return to the User Overview page select the Back button at the bottom
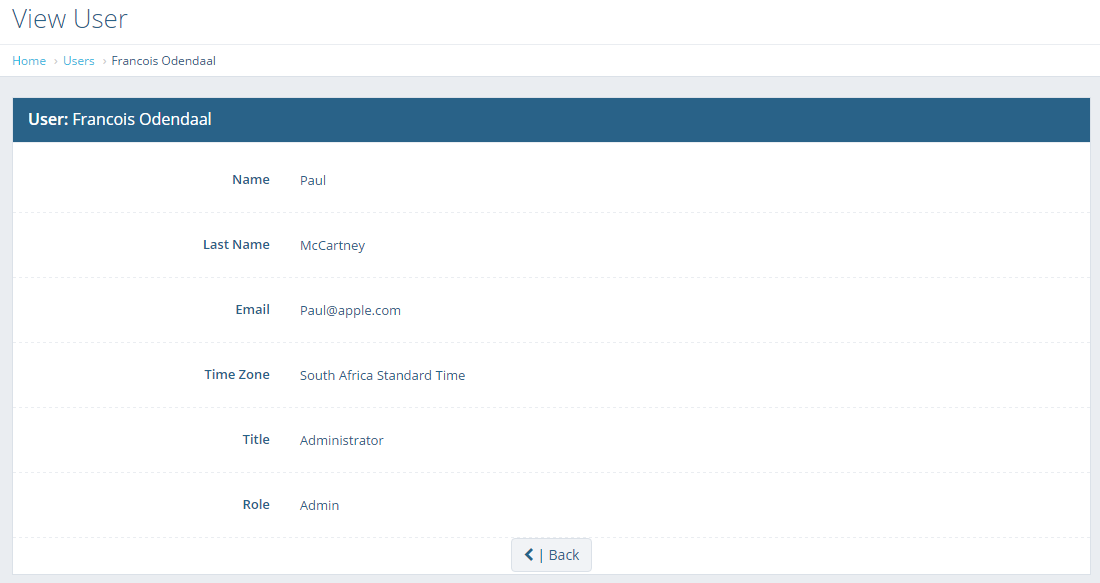
View User
Invite a New User
The Invite User page can be reached by selecting the Invite User button at the bottom of the User Overview page. From this page new people can be invited to your account to help you manage your billing system. These people will receive an email once the invitation has been sent from which they can set up their personal log in details and log in to you Bill Again account.
To add a User you need to specify the following fields:
- First Name
- Email Address
- If they are an Admin (discussed later on)
- Role (discussed later on)
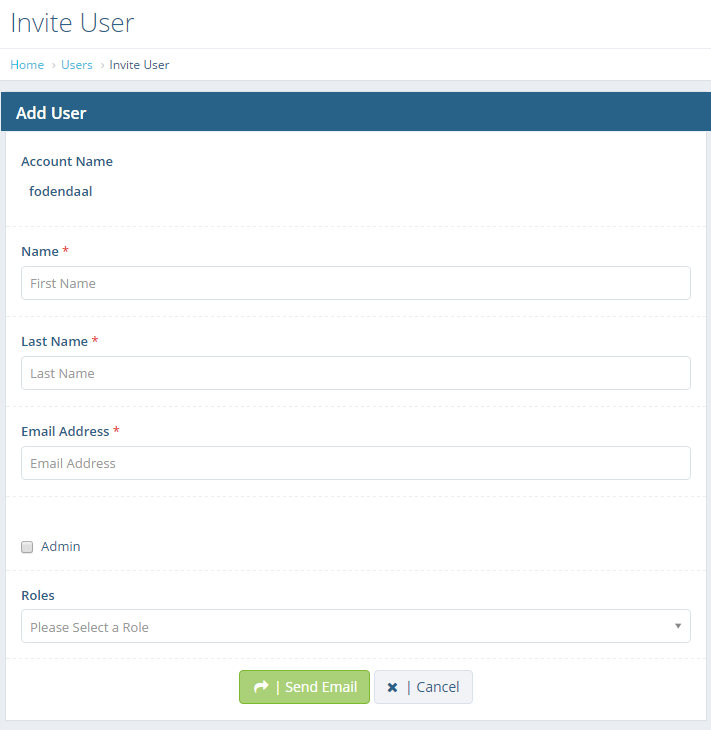
Invite User
Once these details have been entered, select the Send Email button at the bottom and the new user will be invited. On invitation the new user will receive an email, on the email address specified upon registration, containing a link and instructions on how to activate their account. Basically, after the Send Email button has been clicked your work is done and the new User will be able to set up their Account and start working alongside you on your Bill Again acoount.
Roles and Titles
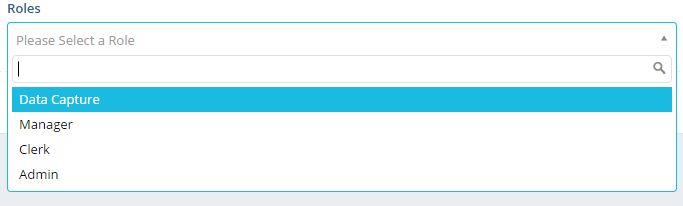
User Role Selection
To keep you in control of things, Bill Again allows you to specify what permissions to specific functions each User on your account has. This process is enabled through the system’s powerful yet simple to user Roles functionality. Roles specify certain rights to each function in your Bill Again account, a role is then assigned to each User which limits and permits the User to perform certain functions within your account.
Please note that the creation and Maintenance of Roles will be discussed in more details in the Roles section of this guide.
In addition to Roles, users’ permissions within the system are also determined by whether they are saved as an Admin User or not. If a User is specified to be an Admin, they will have full access to all the functions of your account. It is important to note that being an admin will therefore overwrite the User’s selected Role.
Specifying a User’s role and whether they are an Admin are required to be done on User add and can also be changed at any time on User edit.
Edit User
To edit the current details of a User you need to select the edit button next to an existing user on the User Overview page. This will redirect you to the edit User page which will display all the User’s currently saved details in their appropriate fields. When editing a user, the only fields which can be changed are their Roles and whether they are an Admin user or not.
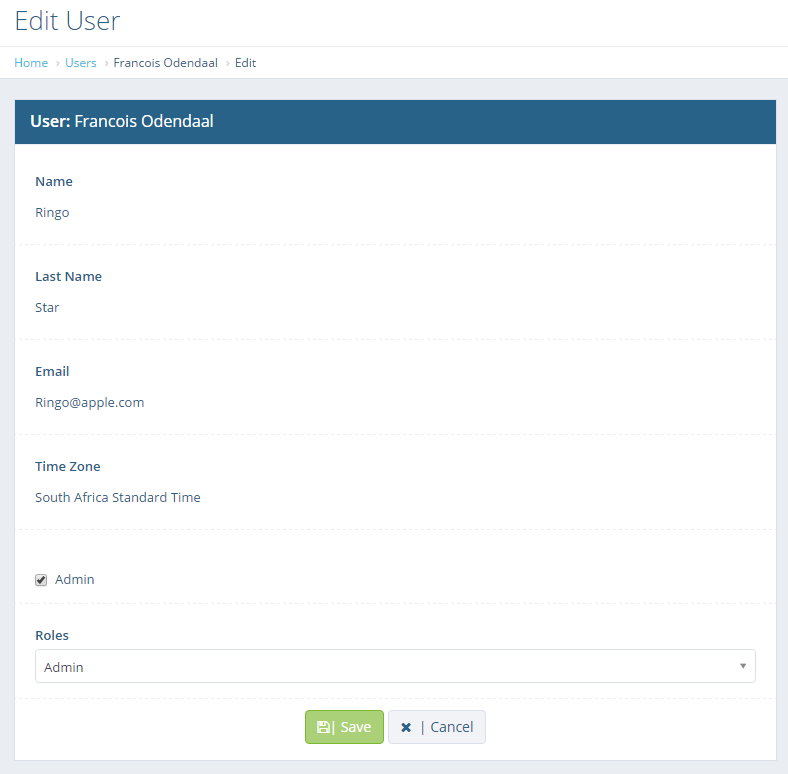
Edit User
Changing these fields are as simple as selecting another Role from the Role dropdown and selecting or unselecting the Admin option from the edit User page. Once you have changed these items as needed it is required to save your changes by clicking the Save button on the bottom of the page. Please not that if you do not click the Save button any changes made will be lost. Conversely, clicking the Cancel button will discard any changes you have made.
Also note that you are able the view yourself, as the user you are logged in as, from this table but not edit the details of the user you are logged in as
Removing User Access
Bill Again allows you to block existing Users from your Account by removing their ability to log in to the system using their profile. This achieved by setting their access status to In-Active, which will result in them not being able to log in using their account details.
To remove a User’s Access, click on the Access button next to a User on the User Overview page. This will change the colour and icon of the button in relation to the User’s current Access status. If the button is green it means they have access and if it’s red it means they are not.
Please note that you are able the view yourself, as the user you are logged in as, from this table but not change the Access status of your own profile.
While Access is a temporary way of blocking a User, you can permanently remove a User from your system and prevent them from ever logging in by deleting them. This process will be discussed below
Delete
To permanently remove a User from the system and prevent them from ever logging in user their account you can delete their profile. To do this select the delete button next to the user you wish to delete from the Users Overview page. Next you will be asked to confirm the delete after which the user will be permanently removed.
Please note that you are able the view yourself, as the user you are logged in as, from this table but not delete your own profile.
Pending Invites
If you have invited a user who have yet to accept your invite they will be listed at the bottom of the User Overview page in a table titled “Pending Invites”. This table will not be visible if there are no User that have been invited and not accepted it.
From the Invites Table you have the option of resending the invite or cancelling it. Re-Sending an invite will resend the invitation email to the user in question in the same manner as was done on their initial invite. This re-invitation will also be sent to the same email address as the first invite. Cancelling an invite will remove the invitation to the prospective User. This means that if they attempt to accept the invite in the future, they will be denied by the system.
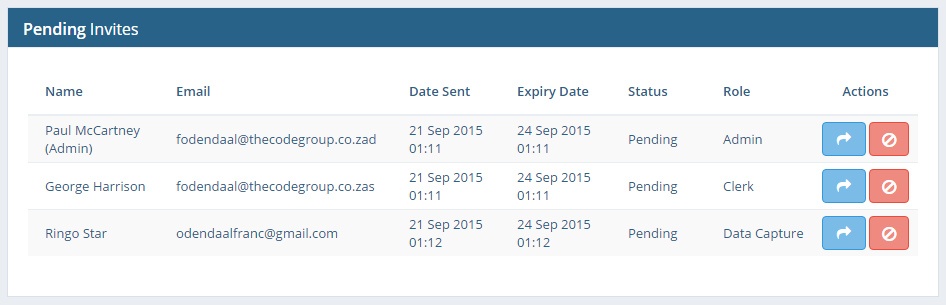
Pending User Invites
Users Overview
The Users Overview page will list all registered Users and Invited, pending, Users. From it you can also Add, Edit, Delete and View Users.
View User
Viewing an existing user will display all the details currently registered to them.
Invite User
The Invite User page from which the details of a new User can be registered.
User Roles
Users can be assigned Roles to give them permission to specific functions.
User Edit
Details registered to existing Users can be changed from their edit page.
Pending Invites
Invited Users that have not accepted their invitation will be listed in the "Pending Invites" table at the bottom of the Users page.