- Customers
- Customer View
- Subscriptions
- Invoices
- Payments
- Manual Payments
- Live Payments
- Payment Methods
- Customer Contacts
- Customer Notes
- Batches
- Early Admin
- Early Invoice
- Early Batches
- Adjustments
- eMandate
Documentation
Getting Started
Manage
Customer
Customers in Bill Again represent the organisations or people to whom you deliver services or products to and will therefore be billing. Subscriptions can therefore be added to Customers which will generate Invoices and ultimately result in Payments being received from Customers. All Customer functions can be accessed by selecting the Customers option from the left-hand main menu. Viewing a Customer provides a host of its own functionalities and will be discussed on its own page in this guide, entitled: Customer View.
Customers Overview
This area of Bill Again is accessed by way of the left-hand main menu, specifically by selecting Customers. This brings the user to a table formatted list of all the Customers currently registered to the system, as shown below:
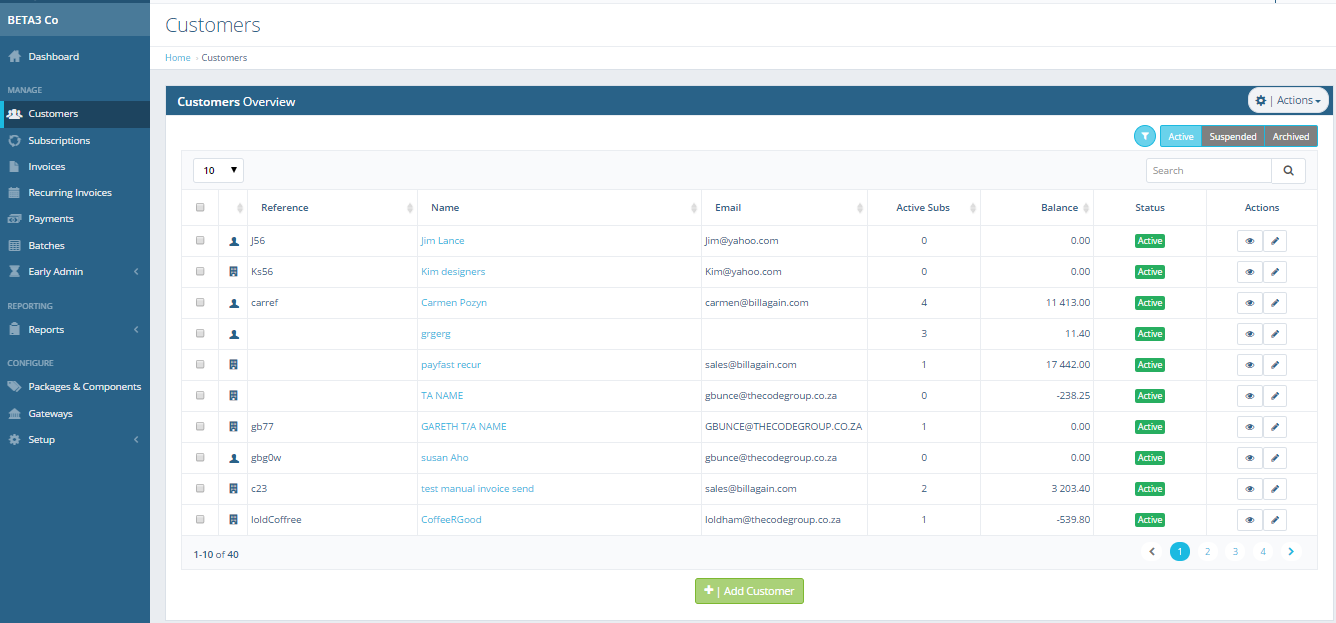
Customers Overview
This screen provides immediate, summary-based information for Customers and gives the user the following options for single, specific Customers:
- Viewing a Customer
- Adding a new Customer
- Editing an existing Customer
From this page you will also be able to see all your Customer statuses.
These include:
- Active - All active Customers will have this status.
- Suspended - Customers that has been flagged as suspended; if the Customer does not pay for his Subscription.
- Archived - When a Customer is dormant but you still wish to store the Customer for future use.
Keep in mind that all current Subscriptions of Customers will become inactive if the Customer's status is changed to inactive, suspended or archived. The Customers displayed on this index can be filtered according to their status by clicking the relevant status filtering buttons on the top right.
Adding a new Customer
You can specify whether you are adding a business or individual when adding a customer. A Customer can be added from the Customer Overview screen via the “Add Customer” button at the bottom of the table. Clicking this button will redirect the user to the “Add Customer” page from which the new Customer’s details can be entered and the Customer can be registered to the system.
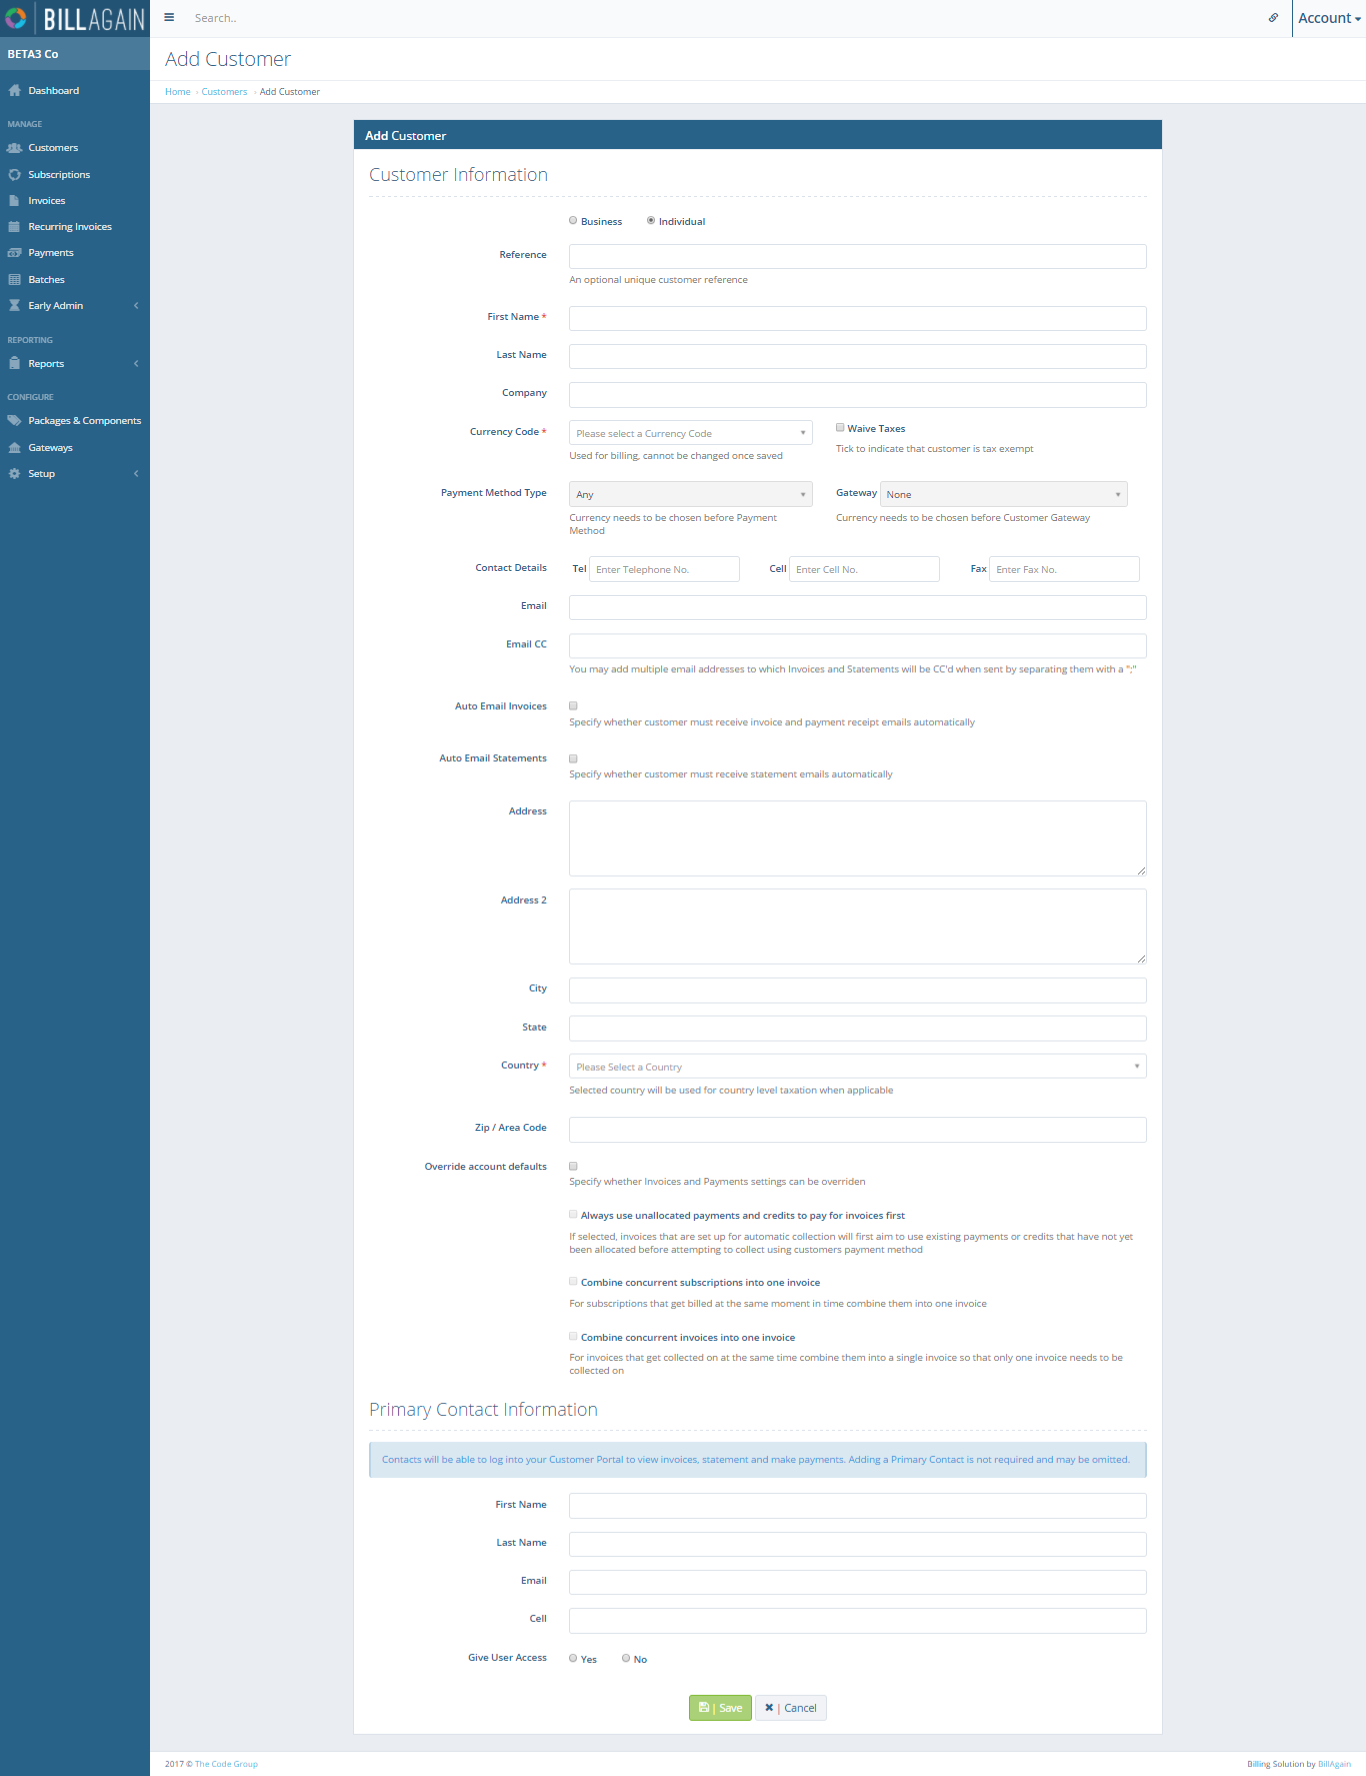
Add Customer
The user will be required to enter at least the following when adding an individual customer, the Customer’s name and select a Currency according to which the Customer will be invoiced and transactions will be conducted with. Other optional fields which can be entered include:
- Reference (unique id according to which customer will be identified)
- Last Name
- Company
- Email (to which invoices and other notifications will be sent)
- Email CC (alternative email)
- Cell
- Address
- City State
- Country
- Tax State (specific taxes will apply to specific states if setup as such)
- Zip/Area Code
- Waive Taxes (exempts a customer from taxes)
- Payment method type (The method which will be used to receive payments from the customer)
- Customer Gateway (The payment gateway through which payments will be processed)
- Auto email invoices
- Override account defaults
The user will be required to enter at least the following when adding a business as a customer, the business name, currency and country. Other optional fields which can be entered include:
- Reference (unique id according to which customer will be identified)
- Business trading as name
- Registration number
- Vat number
- Wave tax (exempts a customer from taxes)
- Payment method type
- Gateway
- Contact details
- Email (to which invoices and other notifications will be sent)
- Email CC (alternative email)
- Auto email invoices
- Auto email statement
- Address
- City State
- Zip/Area Code
- Override account defaults
Once all the relevant information has been added to the new Customer, the user selects the “Save” button and the Customer and all its details will be registered to the system. Alternatively the user may cancel the add operation by selecting the “Cancel” button which will redirect them to the Customers Overview page.
Editing a Customer
The Edit Customer page can be reached by selecting the edit button next to a specific Customer on the Customer Overview page or by selecting the edit button on the view page of a specific Customer. The process of editing a Customer is almost identical to adding a new Customer but differs in that the data previously entered upon its creation will be loaded in their relevant fields. The user will be able to change any data they wish and select the “Save” button to persist the changes.
Alternatively the user can select the “Cancel” button which will discard any changes made and load the Customer’s view page. Keep in mind that Currency Code and Customer Code cannot be edited after a Customer has been created.
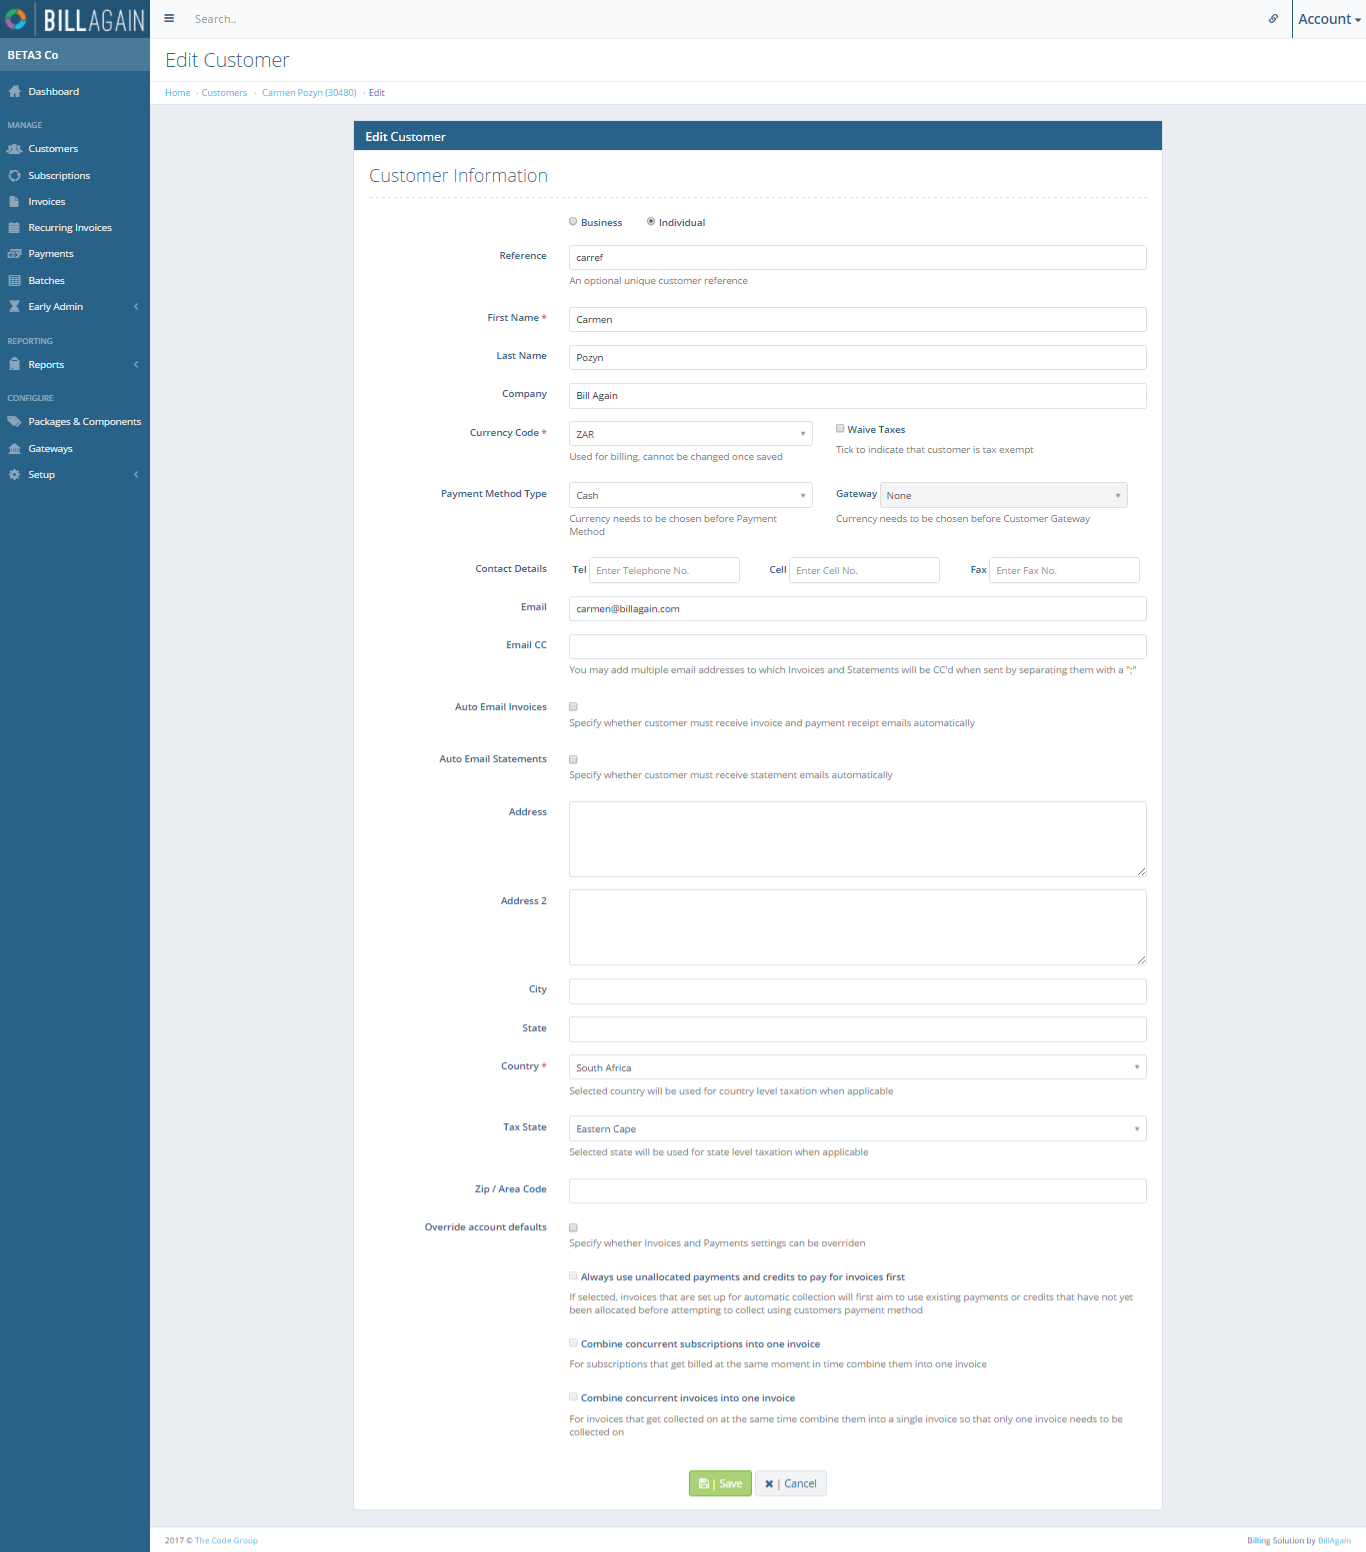
Edit Customer
Viewing a Customer
The view Customer page can be reached by clicking the view button next to a specific Customer on the Customer Overview page. Here you will be able to view all the details registered to the selected Customer. The view page also gives a summary of the following items link to the selected Customer, all these items can be fully added, edited, deleted or viewed:
- Subscriptions
- Invoices
- Live Payments
- Manual Payments
- Credit
- Payment Methods
- Contacts
- Notes and Interactions
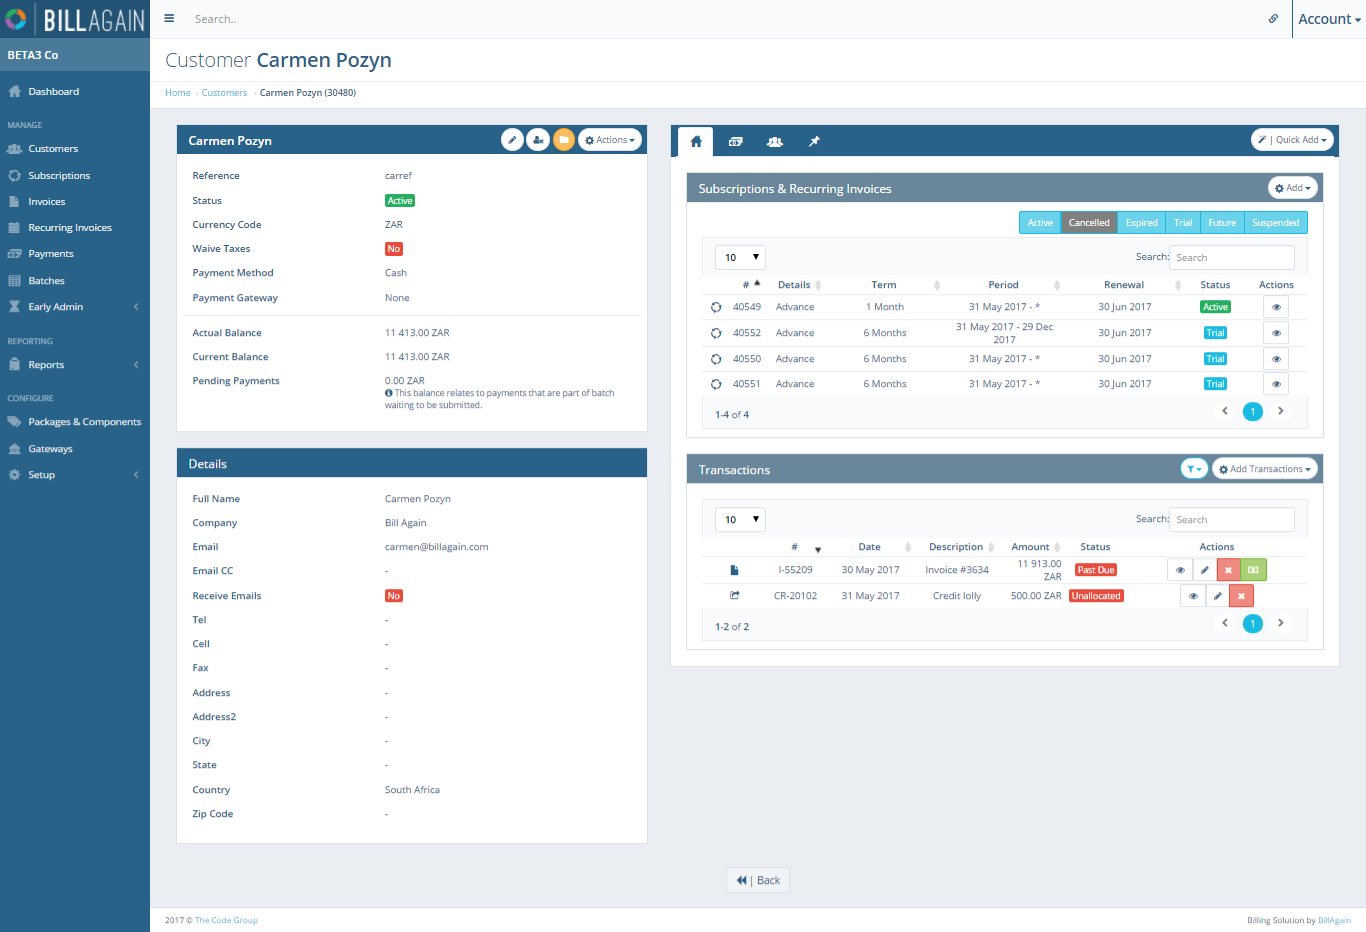
View Customer
Keep in mind that all of the above items are customer specific when adding, editing or deleting from inside the Customer view. These items and the Customer as a whole are discussed in more detail on the Customer View page of this guide.
Archiving a Customer
AArchiving is Bill Again's version of deleting a customer you will not be able to perform tasks such as Payments and adding Subscriptions. A Customer can be archived from the actions button on the Customer Overview page or on the view of a Customer.
Customer Overview
The Customer Overview page from where you can Add, Edit and View Customers.
Add Customer
All the details that can be registered when adding a new Customer.
Edit Customer
All the details of an existing Customer that can be changed when editing.
View Customer
A Customer's view page contains a number of actions that can be performed for the selcted customer. These actions include add, edit, view and deletion of Subscriptions, Invoices, Payments, Credit, Payment Methods, Contacts and Notes